Pages

Showing posts with label freezer cooking. Show all posts

Friday, April 12, 2013

Freezer Cooking Series, Part 3


Welcome back for the third part of my Freezer Cooking Series!
Missed a part?  No problem!
Here is Part One and Part Two!

Now that you know what you have to do to prepare for a freezer cooking session, today I want to share several recipes that I used in my last session!

Most of these recipes, I found here.
This is a great resource to use!

I tend to freeze all of my meals in a Ziploc bag.  I find that it's easiest for me, and I can squeeze several into my freezer!  You can use what works for you!  It really doesn't matter.

I get all my food out and segregate them into meals.


When I first get my Ziplocs out, I write the name of the meal, the date, and how to cook it.


Then I will fill them.


Chicken Broccoli Alfredo
Ingredients:

  • 1 ½ pounds chicken breasts
  • 1 (16 oz) bag frozen broccoli florets (I used fresh)
  • 2 (16 oz) jars Alfredo sauce 
  • 1 large green pepper, chopped
  • 1 (4 oz) can sliced mushrooms, drained


Directions:
Place all ingredients in a resealable gallon-sized freezer bag and mix together.
When ready to eat, remove from freezer and thaw in fridge for 24 hours. 

Cook on LOW for 4-6 hours.
Serve with cooked fettuccine noodles.


>>>>><<<<<


Chicken Cacciatore:
Ingredients:

  • 1 lb chicken breasts
  • 1 (26 oz) jar of chunky vegetable-style spaghetti sauce
  • 1 zucchini, chopped
  • 1 green pepper, chopped
  • 1 sweet onion, chopped

Directions:
Place all ingredients in a resealable gallon-sized freezer bag and mix together.
When ready to eat, remove from freezer and thaw in fridge for 24 hours. 

Cook on LOW for 6-8 hours.
Serve with cooked spaghetti noodles and garnish with olives and cheese. 


>>>>><<<<<

Slow Cooker Beef and Mushrooms:
Ingredients:

  • 3 lbs stew meat, cubed
  • 1 (10.75 oz) can cream of mushroom soup
  • 2 (4 oz each) cans mushrooms, with liquid
  • 1/2 cup apple juice
  • 1 (1 oz) packet dry onion soup mix


Directions:
Combine all ingredients in a resealable gallon-sized freezer bag. Zip closed.
When ready to eat, remove from freezer and thaw in fridge for 24 hours. Cook on HIGH for 6 hours or LOW for 10 hours.
Serve over rice.


>>>>><<<<<

Slow Cooker Creamy Ranch Pork Chops and Potatoes
Ingredients:

1 1/2 lbs pork chops, boneless (about 4-6 chops, thick sliced)
6-8 medium potatoes, chopped into large pieces
2 (10.75 oz each) cans cream of chicken soup
2 (1 oz each) packages dry Ranch dressing mix
1 cup milk
Dried parsley to sprinkle on top (optional)


Directions:
In a bowl, mix together the soups, milk, and ranch dressing mixes and pour into a resealable gallon-sized freezer bag. 


Combine all other ingredients together and zip closed.
When ready to eat, remove from freezer and thaw in fridge for 24 hours. 
Cook on HIGH for 3-4 hours or LOW for 6-7 hours.
Use the extra sauce in the slow cooker as a gravy for the potatoes and the pork chops. Sprinkle with dried parsley if you want.


>>>>><<<<<

I also made the Marinated Chicken from this post because we liked it so much the last time.
So I had 5 meals that I made in less than an hour.


That would last us at least a week and a half (gotta allow for leftovers...there's only 2 of us).
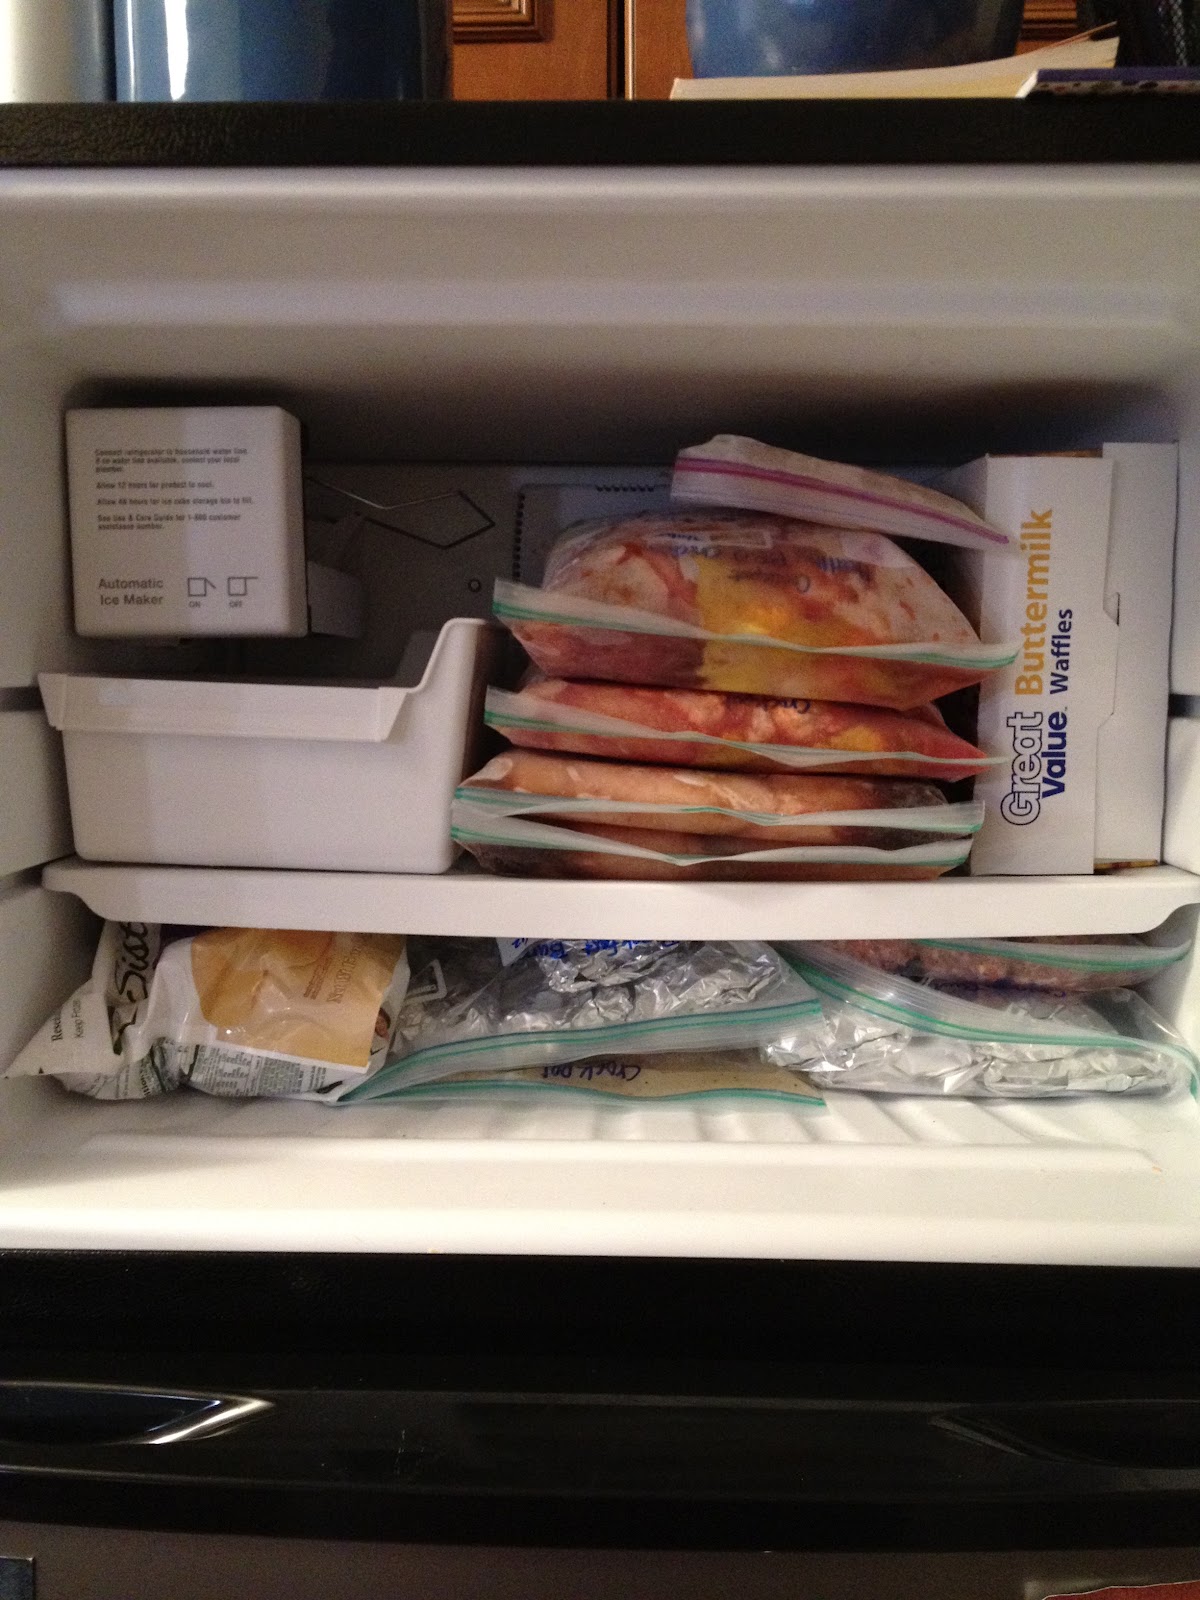
I then stacked them all in my freezer, and off I went.


It's super easy to prepare these meals, and especially easy to have on hand when you don't know what's for supper that night!
Just pull it out of the freezer and dump it in the crockpot!
Sometimes I don't thaw it in the refrigerator, but I will run it under hot water to thaw just a bit before putting in the the crock.

I will also mention that we've eaten all of these now, and they are all delicious!!
We were not disappointed! :)

Have questions?  Feel free to leave a comment or email me!

Happy Freezing!


Friday'sFabulousFoods

Friday, April 5, 2013

Freezer Cooking Series, Part 2


Welcome back for part 2 of our series!

I have had several questions asking me how I go about planning for a freezer cooking session.
I thought I would share my prep work with you.
Please keep in mind, what works for me, may not work for you.

I sit down and plan out the meals that will go in our freezer.

At first I start with a list of the meals I want to freeze.
Sometimes I use Pinterest to help me out.
I also like to use an inventory sheet to keep track of what is in my freezer.
You can get it here.

I have a calendar that I made from excel that I use to write down our suppers.
Since I take my lunch to work, I don't feel the need to plan it out on paper.
I will write out the meal plan for the week (or couple of weeks, depending on how adventurous I'm feeling), and then I will also plan for a Saturday afternoon freezer cooking session.


I tend to gather my recipes and hang them with the calendar.

It makes it super easy to start supper without having to go find the recipe, as well as making it easy to write a grocery list out.

After I write out my {humongous} grocery list, I go to the store to buy everything I need!
I really love to shop at Aldi, because no coupons are needed.
They have discounted items, of their brand, but taste exactly like name brand!
I will do most of my shopping there, and then if I have to, I will make a trip to Walmart.
But I really hate going to Walmart, so I try to avoid it if I can.


The night before my freezer cooking session, I might prep what I can to help the process go faster.
I don't {typically} want to spend all day in the kitchen, and most times I don't want to spend more than a couple of hours.
If I have a lot of recipes that call for veggies {chopped, minced, sliced, etc}, I will cut up what I can and store it in a container overnight.


The next day, I'll gather everything I need and start in!
That is a little bit about how I prepare for my freezer cooking session.

Have a question?  Leave it in the comments or email me!

Come back next week for some new recipes!

Catch the whole series:
Freezer Cooking Series, Part 1
Freezer Cooking Series, Part 3


Friday'sFabulousFoods

Friday, March 29, 2013

Freezer Cooking Series, Part 1


Back in July, I had my first ever freezer cooking session.
I loved it so much, that I've done it a couple more times.
Today starts a new series on freezer cooking.
I will answer all your questions and give you a few recipes {and free printables!} throughout the next couple of weeks!

I have received a few questions regarding freezer cooking.
If you find that you have questions after reading, post them in the comments!
I want to try to answer any questions you might have.
Now, I'm no pro and I don't know all, but I am wanting to help!


What is freezer cooking?
  • Freezer cooking is basically what it says it is.  It's preparing meals or snacks that can be frozen and eaten at a later date.
Why is freezer cooking a good idea?
  • For me, freezer cooking is a back-up plan.  I usually sit down and plan our meals for the  upcoming week(s).  Sometimes I run out of ideas, or need a quick supper fix (especially if we're gone for the weekend and Monday morning comes early).  I prepare {mostly} crockpot meals, so I can throw it in the crock in the morning and it will be ready when I come home from work!
Is freezer cooking expensive?
  • No...in fact, by the time you add up all your food expenses for the week, you will most likely be saving money, especially if you're buying items in bulk.
What kind of containers do you use to freeze your meals in?
  • I use one gallon Ziploc bags!  Since I only have my refrigerator freezer, I choose to use Ziplocs so that they will stack easier.  However, you can also use containers and other dishes.  I recommend using like sizes so they will stack nicer in your freezer.


Freezer Cooking Tips:

1.  Start small.  You don't want to overwhelm yourself the first time you try to fill your freezer.  After you've mastered a few recipes, then go bigger.  You really don't want to bite off more than you can chew.

2. Pick recipes you know you already love.  You can freeze just about anything.  If you have a favorite recipe, use it!  That way you know you will love your meal when it comes time for supper. 

3.  Make sure you have plenty of time.  I always tend to do my freezer cooking on a Saturday that I don't have anything else planned.  Granted, I don't have any kids, so all I have to do is sit my husband in front of his X-Box and I have all day.  I would advise setting at least an hour aside when you plan to freezer cook.

4.  Prep the night before.  I have found that preparing is the thing that takes the longest.  If I have time, I will prep {cut up all the veggies, etc} before I actually package it all.  That cuts out a lot of time on the day I want to freeze it.

5.  If you want a high quality, fresh meal, use high quality fresh veggies.  My husband hates frozen broccoli.  So instead of buying a bag of frozen broccoli like the recipe called for, I bought fresh broccoli instead.  I think that the flavor was better, too.


These are just a few tips that I have for you.  Next week, we will cover how I plan my freezer cooking session.  Be on the lookout for some free printables to help you get organized!

Have a question?  No problem!  You can either email me or put your questions in the comments! 


Catch the whole series:
Freezer Cooking Series, Part 2
Freezer Cooking Series, Part 3
Friday'sFabulousFoods

Sunday, July 15, 2012

Freezer Cooking Part 2

Yesterday, I got the chance to do more freezer cooking.  It only took me a couple of hours and now my freezer is stuffed to the brim!


I only ended up making meatballs, breakfast burritos, soft tacos, and marinated chicken. However, if I would have made any more, I wouldn't have any room to put them in the freezer.


Italian Meatballs:
Ingredients:

  • 1 lb ground beef
  • 1 lb turkey sausage
  • 1/2 cup onion, finely chopped
  • 1/4 cup almond flour 
  • 1 egg
  • 1 tbsp Italian seasoning
  • 1 tbsp basil
  • 1 tbsp garlic, minced
  • 1/2 tsp onion salt, optional
  • 28 oz organic tomatoes, crushed
Directions:
Mix all ingredients together in a large bowl, except the tomatoes.  Shape into golf ball sized meatballs.  

**Place into the crockpot that has been lightly brushed with olive oil to prevent sticking.  Pour tomatoes over the meatballs.  Cook on low for 6 hours or on high for 4 hours.

***This recipe wasn't specifically a "Freezer meal," but I knew that I was going to freeze them anyway.  Instead of ground beef, I used ground turkey (which is cheaper) and I used oatmeal instead of almond flour.  Technically, this is supposed to be a Paleo-friendly meal, but I'm not Paleo.

The meat balls were too sticky to put into a freezer bag right away.  So I got a cookie sheet out and covered it in parchment paper and stuck my meatballs on it.  Then I cleared out a space and stuck the pan in the freezer for about an hour.  This froze them just enough to put them in a freezer bag without problem!

This whole meal cost me about $7.12.


WW Breakfast Burritos
Ingredients:

  • 4 whole eggs
  • 12 egg whites
  • 18 slices of shaved deli ham, chopped
  • 8 whole wheat flour tortillas
  • 1/4 cup shredded cheese

Directions:
Beat the whole eggs, egg whites, and ham until well blended.  Heat a nonstick skillet, sprayed with cooking spray, on medium high heat.  Add egg mixture; cook until set.


Spoon egg mixture into center of tortillas; top with cheese.  Fold in opposite sides of each tortilla, then roll up burrito style.


Wrap in foil; place in freezer bag.


**This is a Weight Watchers recipe.  I'm not sure how many points it's worth though.  It is only 190 calories per burrito, though!


These burritos only cost $0.75 a piece, or $6.03 total!


WW Chicken Burrito Wrap
Ingredients:
  • 1 oz ranch dressing salad mix, dry
  • 7 oz picante sauce
  • 8 oz boneless, skinless chicken breasts, cooked and shredded
  • 8 whole wheat flour tortillas
  • 8 oz light sour cream
Directions:
In a saucepan, combine dressing mix, shredded chicken, sour cream, and picante sauce.  Mix well and heat through.  Fill each tortilla with 1/4 cup chicken mixture.

These burritos cost $0.97 each or $7.75 total!

Marinated Chicken:
Ingredients:
  • 1 bottle of your favorite Italian salad dressing
  • 6 frozen boneless, skinless chicken breasts 
Directions:
Put the chicken in a freezer bag.  Pour the Italian dressing over the chicken.  Seal the bag.  Freeze.

**Pull the bag out of the freezer.  Run it under hot water to thaw a bit.  Throw the contents of the bag in the crockpot.  Cook on high for 4-6 hours or on low for 8 hours.  Serve over rice, with steamed veggies on the side!

Here's the haul from yesterdays cooking fest:


I am excited to have food in the freezer that we can actually eat!  I'll have to let you now how they all taste! :]

Saturday, July 14, 2012

Freezer Cooking Part 1

I told you earlier that I would share the recipes of the first two freezer meals that I put together.  Here they are!  Each recipe makes 2 meals.  So you'll have 2 freezer bags per recipe.


Teriyaki Chicken:
A large bag (or 2 small bags) of baby carrots split between the 2 freezer bags
1 Red onion cut in chunks and split between the 2 freezer bags
1 (20 oz) can of chunk pineapple, undrained in each bag
2 garlic cloves, chopped in each bag
2 chicken breasts in each bag
1/2 cup teriyaki sauce in each bag

At this point, close the bags and freeze them!

**Add 1/4 cup teriyaki sauce to the mixture. Cook on high for 4 hours or on low for 8 hours. Serve over rice.


This recipe turned out to cost me $6.61 per meal, so $13.22 total.


Healthy BBQ Chicken:

2 green peppers cut into slices split between 2 bags
1 red pepper cut into slices, split between 2 bags
1 zucchini chopped and split between 2 bags
3 onions chopped and split between 2 bags
6 red potatoes, chopped and split between 2 bags (you can also use sweet potatoes)
4 garlic cloves chopped and split between 2 bags
4 chicken breasts split between 2 bags
1/2 TBSP quick cooking tapioca per bag (I used flour as a substitute)
1 (15 oz) can of tomato sauce split between 2 bags
1 TBSP of brown sugar per bag
1 TBSP of Worcestershire sauce per bag
1 TBSP of mustard per bag
1/4 tsp of salt per bag

Close bags and put them in the freezer!

**Cook on high for 4 hours or on low for 8 hours. Serve over rice or egg noodles.


This recipe cost me $5.42 per meal, so $10.84 total.


I'm looking forward to eating these!  They sound delicious!

Thursday, July 12, 2012

Freezer Cooking Trial Run

This week I have been totally exhausted.  I'm still trying to recover from this past weekend, and I'm SO thankful that tomorrow is FRIDAY!!!  I will definitely be sleeping as long as I can on Saturday morning. :]


Keeping in mind that I'm not what-so-ever a morning person, I got up on Monday morning and thought, "Oh crap! What are we eating for supper tonight?"  I am sooooo proud of myself.  I must have known I was going to be tired and wouldn't want to cook.  Ya know what I had planned?  A crockpot meal.
Me: 1.  Monday: 0.


As the day progressed, I kept thinking about how much I love my crockpot.  I love the ease of coming home and smelling whatever is for supper.  I love coming home and not having to worry about cooking supper.  It's fantastic.  It has helped me out so much, and I don't have to stress about it.


I got this awesome idea to start freezer cooking.  I looked up recipes on Pinterest, as well as used one of my favorite websites, Money Saving Mom.  Crystal (MSM) does a lot of freezer cooking herself, so I thought I would see what kind of things she has blogged about in the past.


I found several recipes, made a ginormous grocery list, and set out shopping for my groceries.


This is what I came up with:


I was so excited about my deals that I got, that I wanted to start right away. Here are some pictures of the process it took:


I only finished 2 of the recipes.  I'm hoping to do some more freezer cooking on Saturday when I'm rested and have more time.  However, I'm very excited about having complete meals in my freezer!  All I have to do is dump it in the crockpot and forget about it until I come home from work! Woo!!